The thrill of gliding down a snow-covered slope disappears when you notice scratches or gouges marring your precious snowboard. These imperfections, if left unchecked, can compromise your board’s performance and safety, leaving you with a bumpy ride. Don’t let scratches put your snowboarding adventures on hold. Embrace the DIY spirit and tackle those unsightly marks with this comprehensive guide.
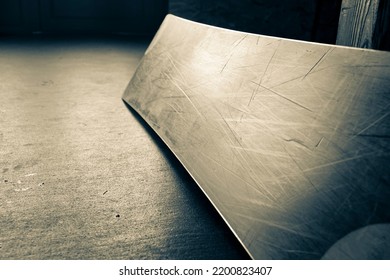
Image: www.shutterstock.com
Understanding the Nature of Snowboard Scratches
Scratches on a snowboard are inevitable consequences of carving through icy terrains and encountering obstacles. They can be classified into two primary types:
-
Surface Scratches:
These shallow blemishes only graze the surface of the board, leaving minor cosmetic imperfections visible to the eye and fingertip. Surface scratches do not affect the board’s performance or integrity.
-
Deep Scratches:
More severe gouges extend beyond the surface, cutting into the core of the board. These deep scratches can impact the board’s structural integrity and compromise its riding characteristics.

Image: www.youtube.com
Assessment and Preparation
Before embarking on the repair process, thoroughly inspect your snowboard to assess the severity of the scratches. Use your fingertips to gauge their depth and determine the appropriate repair technique. Additionally, clean the affected area with a mild detergent and water, ensuring a spotless surface for optimal adhesion of repair materials.
DIY Repair Techniques for Surface Scratches
If your scratches are primarily superficial, you can easily patch them up with household items.
-
Toothpaste:
The mild abrasives in toothpaste can help buff out shallow scratches. Apply a small amount to the scratched area and gently rub it in circular motions using a soft cloth. Rinse with water and dry thoroughly.
-
Candle Wax:
Fill the scratch with candle wax, allowing it to solidify. Use a plastic scraper to remove the excess wax, leaving a smooth surface.
-
Super Glue:
Apply a tiny drop of super glue to the scratch. Hold the edges of the scratch together and let the glue set for a strong bond. Wipe away any excess glue for a seamless finish.
Professional Repair for Deep Scratches
Deep scratches require more specialized attention from experienced professionals. P-tex (polyethylene) is a durable material often used to fill in gouges and restore the board’s integrity.
-
P-tex Repair:
A P-tex stick is heated and melted into the scratch, creating a durable patch. Once cooled, the excess P-tex can be trimmed for a smooth surface.
-
Epoxy Resin Repair:
For even deeper gouges, epoxy resin provides a stronger bond. Apply the resin to the scratch and cover it with a patch. Clamp the patch in place and let the resin cure for a solid repair.
Prevention is Key
While repairs can rejuvenate your snowboard, prevention is the ultimate strategy. Consider using a protective base wax to create a barrier against scratches. Additionally, avoid riding on rocky or icy terrain and store your snowboard in a cool, dry place to minimize damage.
How To Fix A Scratched Snowboard
Conclusion
Scratches on your snowboard are not harbingers of retirement; they are opportunities for restoration. By understanding the different types of scratches and employing the appropriate repair techniques, you can restore your board’s smooth ride and reclaim the thrill of conquering the slopes. Remember, the journey of snowboard maintenance is ongoing, just like the exhilaration of each ride down the mountain.
