Kayaking is an incredibly rewarding water sport, allowing explorers to venture into secluded waterways and experience nature’s tranquility from a unique perspective. However, even the most durable kayaks can suffer the occasional crack or puncture, potentially spoiling an otherwise enjoyable adventure. If you find yourself facing this adversity, fear not! With the right tools and a bit of know-how, you can easily fix a cracked kayak and get back on the water in no time.
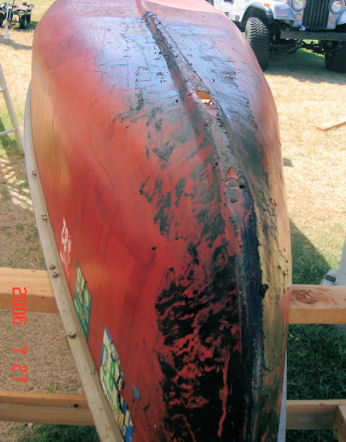
Image: www.polyvance.com
Assessing the Crack
Before initiating repairs, it’s crucial to thoroughly assess the extent of the crack. This will help you determine the best approach and materials needed. First, carefully examine the crack’s location and size. Note whether it’s a superficial scratch or a more significant puncture. Additionally, consider the type of kayak material, which can be polyethylene (plastic), fiberglass, or composite. Once you have a clear understanding of the crack, you can proceed to gather the necessary equipment.
Materials You’ll Need
The specific materials you require will depend on the nature of the crack and the kayak’s material. For most repairs, the following items should suffice:
- Epoxy resin and hardener
- Fiberglass cloth or mat
- Sandpaper (80 and 120 grit)
- Mixing cups and stir sticks
- Heat gun or hair dryer
- Spatula or plastic scraper
- Safety gear (gloves, mask, ventilation)
Step-by-Step Repair Process
-
Preparation: Clean the area around the crack thoroughly using a degreaser or rubbing alcohol. Sand the surface along the crack’s edges with 80-grit sandpaper to remove any imperfections.
-
Mixing Epoxy: In a well-ventilated area, mix the epoxy resin and hardener according to the manufacturer’s instructions. Use a stir stick to achieve a smooth, bubble-free consistency.
-
Applying Epoxy: Apply a thin layer of epoxy over the crack using a spatula or plastic scraper. Allow the epoxy to cure partially before applying the fiberglass cloth or mat.
-
Fiberglass Reinforcement: Cut a piece of fiberglass cloth or mat to cover the crack and extend at least 2 inches beyond its edges. Place the fiberglass over the epoxy and smooth out any wrinkles or air bubbles using your fingertips.
-
Apply More Epoxy: Apply a second layer of epoxy over the fiberglass reinforcement. Use the brush or stick to press the fiberglass into the epoxy, ensuring good adhesion.
-
Curing: Allow the epoxy to cure completely before sanding. This curing time can vary depending on the epoxy used and the temperature. Consult the manufacturer’s guidelines for specific curing times.
-
Sanding: Once the epoxy has cured, smooth the repaired area by sanding with 120-grit sandpaper. Start with gentle strokes and gradually increase pressure as needed.
-
Touch-Up: If necessary, apply a touch-up layer of epoxy and sand again to ensure a smooth and level finish.
Conclusion
With a little patience and elbow grease, you can effectively repair a crack in your kayak and restore its integrity. By following these steps carefully, you can get your beloved watercraft back in tip-top shape and continue exploring those serene waterways with confidence. Remember, kayaking is an activity meant to be enjoyed, so don’t let a crack sideline you for long. Embrace the adventure, embrace the repair, and keep paddling!

Image: www.youtube.com
How To Fix A Crack In A Kayak
