My living room, once adorned with an outdated popcorn ceiling, had always been a sore spot for me. The rough texture and yellowed appearance made the space feel cramped and dated. Determined to transform its aesthetics, I decided to embark on a DIY mission to remove the popcorn ceiling and restore its smoothness. Through meticulous research and hands-on experience, I discovered a set of proven techniques and valuable tips that I’m eager to share.
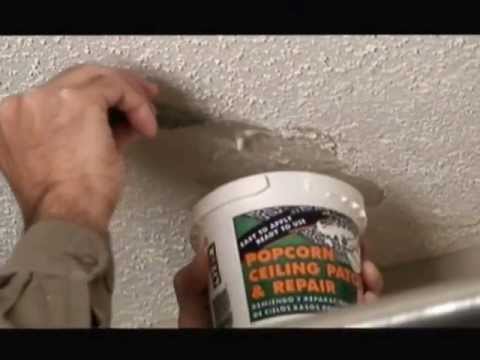
Image: reverasite.com
The Popcorn Ceiling Conundrum
Popcorn ceilings, also known as acoustic ceilings, were popular in the 1950s to the 1980s for their sound-absorbing properties. However, over time, they have fallen out of favor due to their outdated appearance and the potential risks associated with the asbestos they may contain. Removing a popcorn ceiling can be a daunting task, but with the right tools, safety precautions, and a bit of patience, it’s certainly doable.
Safety First: Tackling Asbestos Concerns
Before commencing any work, it’s crucial to assess whether your popcorn ceiling contains asbestos. This hazardous material can cause serious health problems if inhaled. If your home was built before the mid-1980s, it’s advisable to have the ceiling professionally tested for asbestos. If asbestos is present, do not attempt to remove the ceiling yourself; instead, hire a certified asbestos abatement contractor.
Tools and Materials: Arm Yourself for Success
To ensure a smooth popcorn ceiling removal process, gather the following tools and materials:
- Respirator mask
- Safety glasses
- Plastic sheeting
- Painter’s tape
- Ceiling scraper
- 5-in-1 tool
- Putty knife
- Bucket
- Water
- Spackling paste
- Sandpaper
- Primer
- Paint
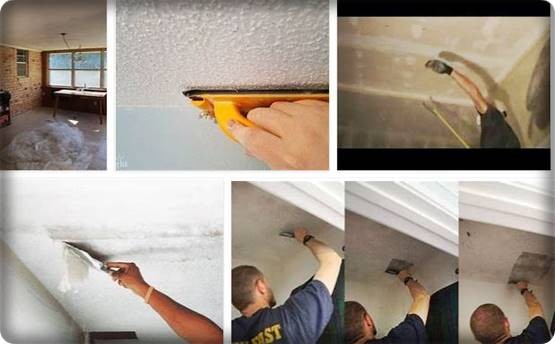
Image: www.handpowertoolslist.com
Step-by-Step Guide: Achieving a Smooth Finish
Now, let’s dive into the step-by-step process of removing a popcorn ceiling and creating a smooth surface:
-
Prepare the Room: Cover the floor and furniture with plastic sheeting to protect them from debris. Seal off any entrances to adjoining rooms with painter’s tape to prevent dust from spreading.
-
Test for Asbestos: Before proceeding further, test a small sample of the popcorn material for the presence of asbestos. If positive, stop work immediately and hire a professional.
-
Spray Water: Using a garden sprayer or a wet-dry vacuum with a spray attachment, thoroughly wet the popcorn ceiling. This helps loosen the popcorn material.
-
Scrape Away Popcorn: Using a ceiling scraper or a 5-in-1 tool, gently scrape away the popcorn material. Apply moderate pressure to avoid gouging the drywall beneath.
-
Smooth the Surface: Use a putty knife to smooth out any rough edges or imperfections left by the scraping.
-
Apply Spackling Paste: Fill any holes or depressions in the drywall with spackling paste. Let it dry completely and sand it down to create a smooth surface.
-
Prime and Paint: Once the spackling paste is dry, apply a coat of primer to the entire ceiling. This improves paint adhesion and creates an even base for the topcoat. After the primer has dried, you can apply two coats of paint in your desired color.
Tips and Expert Advice for a Flawless Finish
To achieve a professional-looking finish, consider the following tips and advice from experts:
- Use a wetting agent to enhance the water’s effectiveness in loosening the popcorn material.
- Wear proper protective gear, including a respirator mask and safety glasses, to minimize dust inhalation.
- Exercise patience and work in small sections to avoid overwhelming yourself.
- If the popcorn material is particularly stubborn, use a heat gun or steamer to soften it before scraping.
- Allow ample time for the ceiling to dry before moving on to subsequent steps.
Frequently Asked Questions (FAQ)
Q: Can I remove a popcorn ceiling myself?
A: Yes, removing a popcorn ceiling is possible as a DIY project with the right tools, safety precautions, and a bit of patience.
Q: How much does it cost to remove a popcorn ceiling?
A: The cost of removing a popcorn ceiling varies depending on the size of the ceiling, whether the material contains asbestos, and your location. On average, you can expect to pay between $1,000 and $2,500 for professional removal.
Q: Is it possible to paint over a popcorn ceiling without removing it?
A: While it is technically possible to paint over a popcorn ceiling, it is not recommended. The rough texture can make for an uneven and poor-quality paint finish. Additionally, the paint may peel or crack over time.
How To Fix A Popcorn Ceiling
https://youtube.com/watch?v=QtVFnQKbPmk
Conclusion
With careful planning, proper safety measures, and attention to detail, you can successfully transform your popcorn ceiling into a smooth and modern surface. Whether you choose to tackle the removal process yourself or entrust it to professionals, the end result will be a more aesthetically pleasing and comfortable living space. Remember to consider the tips and advice shared in this guide to ensure a flawless finish. Happy ceiling remodeling!
Are you interested in learning more about popcorn ceiling removal? Leave a comment below or visit our website for additional resources and expert advice.
